![]()
7 Steps to Defy Gravity and Master Handstand
Originally posted by Yoga Journal on April 24, 2014 and appeared in the June 2014 issue
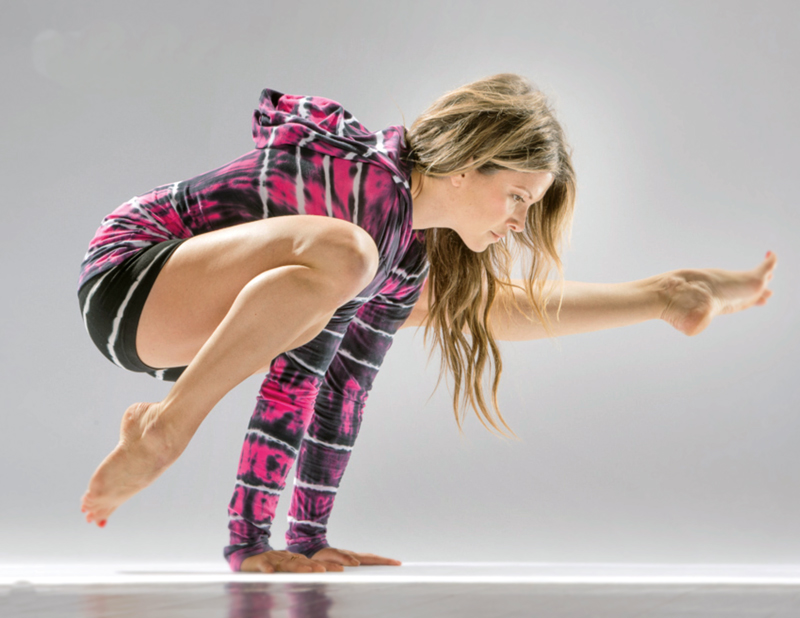
Inversions are challenging and, yes, a little scary, but this sequence can help you learn freestanding Handstand (Adho Mukha Vrksasana)—as in, no wall, in the middle of a room as your practice progresses. Work with a partner who can spot whether your ankles, hips, and hands aren’t aligned—common form mistakes that topple Handstand. (Leave hands-on adjustments to an experienced teacher.) To ensure you have enough strength to work toward Handstand, first be sure you can hold Chaturanga Dandasana (Four-Limbed Staff Pose) or Adho Mukha Svanasana (Downward-Facing Dog) for about 5 minutes.
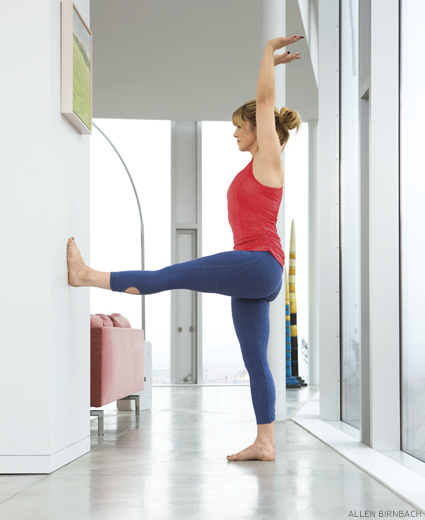
Step 1: Standing L Shape
Stand about one-leg’s distance from a wall, aligned in Tadasana (Mountain Pose). Lift your right leg to hip height and straighten to place your foot flat on the wall, directly ahead of your right hip, so that the leg is parallel to the ground. Keep your foot vertical. Make sure your standing leg is directly under your left hip. You want to create a right angle between your femur bones. Reach your arms up alongside your ears, keeping them shoulder-distance apart. Finally, flex your wrists so that your palms face the ceiling as if you were doing Handstand. After 5 breaths, repeat with the left leg raised.
Tip: If the foot of your raised leg is higher than your hip when your standing foot is directly under its corresponding hip, move farther from the wall.
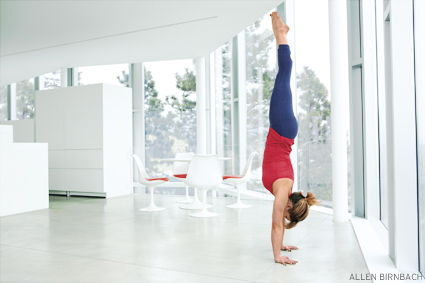
Step 2: Half Handstand
A: Both feet on wall. Stand with your back against the wall, and place your fingertips where the edges of your heels were in Standing L, coming to a short version of Down Dog. One leg at a time, place your feet on the wall at hip height, coming to an inverted L shape. Bring your feet together and press your legs straight, kneecaps pointing toward the ground. Arms next to your ears, press evenly through your hands and roll your outer arms toward the wall. Reach your sitting bones straight toward the ceiling. After 10 breaths, come down and rest in Uttanasana.
B: One leg lifted. Return to Half Handstand. Lift your left leg ceiling-ward, leading with your inner thigh, so that your pelvis stays level. Stop when it feels like your left side is stacked in a vertical line from your hand to your foot. Reach through the ball of your raised foot. After 5 breaths, lower the leg and repeat on the right side. Rest in Uttanasana.
Tip: Once you lift your leg, commit to memory how your shoulders feel in relation to your hands; this pose gives you a sense for true vertical alignment.
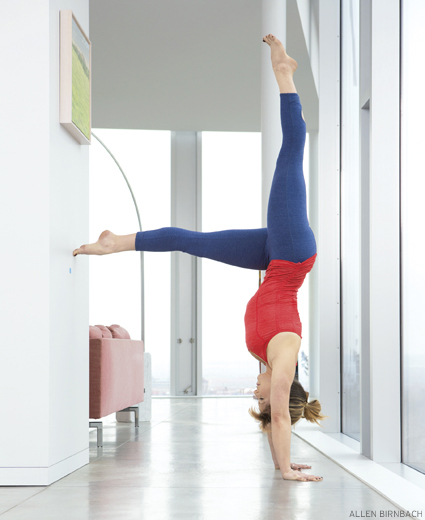
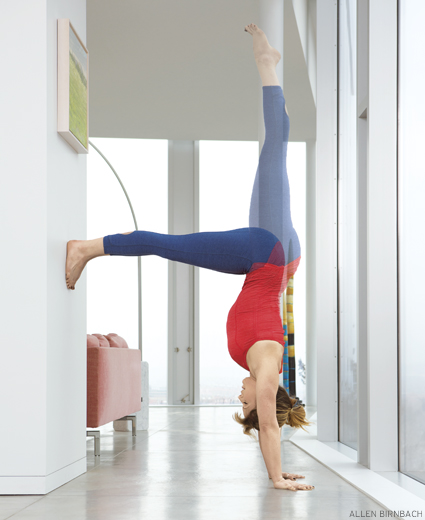
Step 3: Half Handstand Toe at the Wall
From Uttanasana come to Down Dog. Move your hands a few inches farther from the wall, and return to Half Handstand, with your left leg lifted. Press the ball of your right foot into the wall, shifting the point of contact to your big toe, so that the heel lifts free. Take 5 breaths, lower the leg, and repeat on the other side.
Tip: Engage your lower abdominal muscles to maintain balance.
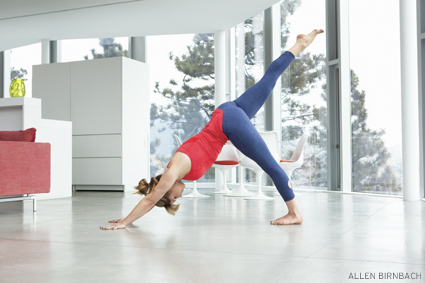
Step 4: Three-Legged Downward Dog
From Down Dog, lift your left leg as high as your hip, leading with your inner thigh so that your heel stays in line with your second toe. Continue to lift your leg, creating a straight line from your left hand to your left foot, which will alert you to the alignment Handstand requires. After 5 breaths, lower your leg and repeat on the other side.
Tip: Don’t rotate your raised leg, and keep your hips square; if your leg turns in or out, it causes your pelvis to shift, making balancing in Handstand impossible.
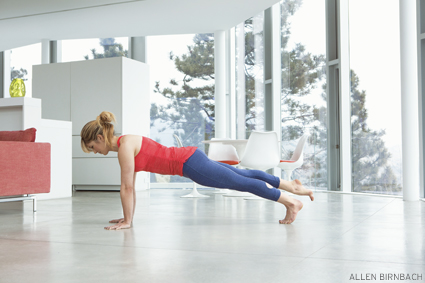
Step 5: Plank with Leg Lifts
From Three-Legged Downward Dog, come to Downward Dog, and shift to Plank Pose, making sure your hands are under your shoulders. Lift your left foot 3 or 4 inches off the ground, leading with your inner thigh and reaching your toes and the ball of the foot back. Your body’s left side is in the shape of Handstand, from torso to foot. Stay for 5 breaths. Maintaining the alignment in your left side, press back to Three-Legged Downward Dog, and then bring your foot down. From Downward Dog, shift forward to Plank and repeat on the right side.
Tip: Focus on this pose to build arm strength and awareness of shoulder alignment.

Step 6: Handstand Hop-Ups
A: Take Down Dog, and then shorten your stance to about one-third the distance you normally have between hands and feet. Shift your shoulders 2 inches past your wrists (this will position your upper body correctly when you kick up). Lift your favored leg as high as possible, leading with your inner thigh to keep your pelvis square with your shoulders.
B: Bend the leg that’s down, and push off the ground with the ball of the foot, using that leg as a spring to lift both legs overhead. You’re aiming to get your pelvis over your shoulders and bring your straight leg toward vertical. Keep the springing leg bent and close to your belly. Try at least 5 times.
Tip: You might be tempted, but don’t kick at all with your leading leg.
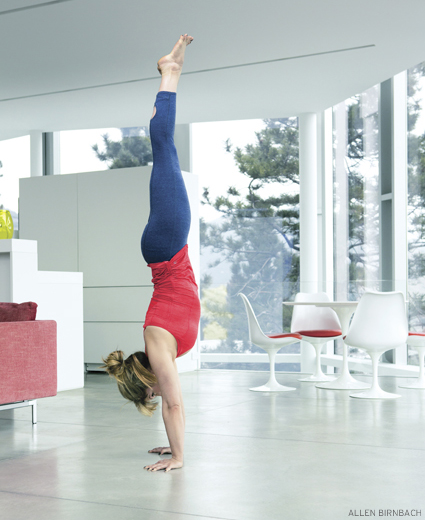
Step 7: Handstand
With practice, you’ll begin to hover in Handstand Hop-Ups, one leg straight, the other bent. When that happens, you can slowly straighten the bent knee while aiming the ball of the foot for the ceiling. Take your time; the bent knee is a counterbalance that prevents you from kicking past vertical. As your strength builds over time, you will be able to use less springing to lift your legs.
Tip: Gently shift your weight between your finger pads and the heels of your hands to hone your balance.
To see a step by step guide, click over to YogaJournal.com